
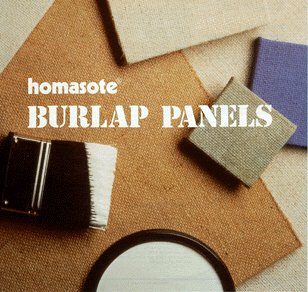
HOMASOTE® BURLAP PANELS
Burlap is a natural fabric and can vary in shade between production runs. Prior to installation, Burlap Panels should be positioned in place to assure that the desired appearance is obtained.
PRODUCT DESCRIPTION
Homasote Burlap Panels are composed of an all natural, heavyweight
jute fabric laminated to a nominal 1/2" structural Homasote fiberboard,
free of asbestos or formaldehyde additives.
USES
Decorative, tackable Burlap Panels are used in both residential and
commercial construction. These versatile panels are ideal for a range of
applications from family rooms and children’s bedrooms to school rooms
and business offices – anywhere the rich look of a natural fabric and/or
a fully tackable wall would be appreciated.
ADVANTAGES
Burlap Panels have the unique versatility to be used as a finished
paneling in its natural state or painted to adapt to any color or decor
necessary. In addition, it provides a fully tackable surface that conceals
tack holes and reduces sound due to its interesting texture.
SIZES (nominal*)
Thickness: 1/2"
Width: 4'
Length**: 8'
Weight: 1.0 lb./sq. ft.
*Actual length and width 1/8" shorter.
**Also available in lengths of 10' and 12'.
Flame Spread: Class III (or C).
Also available on special order Class I (or A).
SPECIFICATIONS (substrate)
Density, lb./ft.³: 24-26
Hardness (Janka Ball) lbs. (min.): 200
Tensile Strength, psi: 350-600
Mod. of Rupture, psi: 650-900
Mod. of Elasticity, psi: 69,000
Water absorption by vol. (max.)
(2 hr. immers.): 5 %
(24 hr. immers.): 15%
Expansion from 50% to 90% rel. hum.
(max.): 0.25%
Thermal Conductivity (k factor): 0.42
R-value: 1.11
NRC: 0.20
Flame Spread: Class III (or C).
ARCHITECTURAL SPECIFICATION (short form)
All _____ as shown on drawings shall be Homasote Burlap Panels as manufactured
by the Homasote Company, West Trenton, N.J. and installed in accordance
with current Homasote installation instructions.
PACKAGING, STORAGE AND PROTECTION
Panels should be kept in original packages, stored in a dry place indoors
or on a raised platform, protected from weather damage.
GENERAL CONSTRUCTION DATA
Illustrated installation instructions are given in Homasote Bulletin
BP-8-802-2. This bulletin details the Homasote approved installation requirements
and step-by-step procedure. The following information is for product evaluation
only.
Temperature and humidity conditions closely approximating those which will exist when building is occupied shall be maintained before, during and after the application of Burlap Panels.
Installation shall not be made when building is excessively cold, hot and/or damp.
All Burlap Panels shall be removed from protective packaging not less than 24 hours prior to application and placed singly and vertically around walls exposed to environmental temperature and humidity conditions.
Panels should be observed carefully at this time to determine and insure desired effect with respect to color, texture, panel sequence, etc. It may be found necessary to invert certain panels to alter direction of grain, color or weave to achieve best results.
During installation, Burlap Panels must be applied leaving 1/8" expansion space between adjoining panels. Allow 1/4" spacing at floor, ceiling and around windows and door frames, etc. Framing must not exceed 16" o.c. Panel edges must be supported at all times. As with any natural fabric material, care should be taken in handling panels with clean hands.
The surface and its appearance can be kept fresh and clean with negligible maintenance. Soils or grime can be removed by brush-vacuuming, or with soap or detergent and water. Do not flood. Use a wet (not soaked) rag, sponge or soft bristled scrub brush. Remove soap or detergent using a clean cloth or sponge wet with clean water. Do not flood. Exposure to u/v light will cause color shading.
MATERIALS, FINISHES
Burlap Panels are a prefinished paneling with a natural color jute
fabric that does not require additional finishing. If, however, an alternate
color is required to fit a particular design, the jute fabric may be painted.
See "Painting Burlap."
Also available are Homasote joint and trim moldings in low lustre black or white for a neat, professional finish. These moldings include: cap, inside and outside corners, and "H" for butt joints.
CLASS "A" RATED Natural, tight-weave burlap fabric that has been chemically treated to resist fire, is factory laminated to N.C.F.R.® Homasote to form a Class "A" Fire Rated Interior Paneling.
Fire Resistant Burlap Panels have a Flame Spread of 20, a Fuel Contribution of 10 and a Smoke Development of 0. They are a tackable, structurally strong panel that qualifies for use in educational, institutional, museum or publicly attended facility – anywhere a Class A Fire Hazard rating is required.
AVAILABILITY
Homasote building products are available throughout the United States
and Canada from local building material dealers. Dealers should have samples
and literature describing all Homasote products. If not, write directly
to Homasote Company.
INSTALLATION INSTRUCTIONS FOR HOMASOTE BURLAP PANELS
NAIL SELECTION
Use colored paneling nails and drive flush with paneling or small headed
finishing nails and counter-sink below the surface of burlap fabric. In
either case be sure nails are of sufficient length to penetrate into wood
framing a minimum of 3/4".
APPLICATION INSTRUCTIONS
A. GENERAL REQUIREMENTS
Temperature and humidity conditions closely approximating those which will exist when building is occupied shall be maintained before, during, and after the application of Burlap Panels.
Installation shall not be made when building is excessively cold, hot, and/or damp.
All Burlap Panels shall be removed from protective packaging not less than 24 hours prior to application and placed singly and vertically around walls exposed to environmental temperature and humidity conditions.
Panels should be observed carefully at this time to determine and insure desired effect with respect to color, texture, panel sequence, etc. It may be found necessary to invert certain panels to alter direction of grain, color or weave to achieve best results.
During installation, Burlap Panels must be applied leaving 1/8" expansion space between adjoining panels. Allow 1/4" spacing at floor, ceiling, and around window and door frames, etc.
Panel edges must be supported at all times. As with any natural fabric material care should be taken in handling panels with clean hands.
B. INSTALLATION TO WOOD FRAME WALLS
1. Framing must not exceed 16" o.c.
2 Apply a 3/8" bead of APA approved paneling adhesive to studs in accordance
with the adhesive manufacturer’s recommendations. (A double bead of adhesive
is necessary on studs where adjoining panels fall).
3. Apply Burlap Panels to adhesive and framing, applying hand pressure
where adhesive is located to insure positive contact, and nail* 12" o.c.
along edges and 24" o.c. along all intermediate framing.
4. If adhesive is omitted, nail panels 6" o.c. along all edges and
12" o.c. along intermediate framing.
*See "Nail Selection."
C. INSTALLATION TO METAL FRAME WALLS
1. Framing must not exceed 16" o.c.
2. Attach metal frame clips to long edges of panel every 12" o.c. (See
"Metal Frame Clips" diagram on opposite side).
3. Apply a 3/8" bead of sub-floor adhesive meeting APA AFG-1
specification to intermediate studs in accordance with the adhesive manufacturer’s
recommendations.
4. Apply wall panels to adhesive and framing, applying hand pressure
from the center of panel out to the ceiling and floor where adhesive is
located to insure positive contact, and screw panels 6" o.c. to plates
or blocking at floor and ceiling. Screws should be of sufficient length
to penetrate 3/4" into framing. Hold screws 3/8" back from edge
of panels. Screw clips to framing and brace panels for a minimum of 24
hours for adhesive to set.
D. INSTALLATION TO MASONRY WALLS
1. Install wood furring strips, not exceeding 16" o.c.
2. Apply Burlap Panels following "Installation to Wood Frame Walls."
E. INSTALLATION TO FINISHED WALL
1. Apply wall panels following "Installation to Wood Frame Walls" or
"Installation to Metal Frame Walls," putting adhesive to back of wall panels
instead of on framing in 3/8" beads 16" o.c. and at perimeter, holding
adhesive back 3/4" from edge. Panels must be aligned such that panel edges
would fall on framing behind finished wall. Panels must be fastened to
framing behind finished wall.
PAINTING BURLAP
1. After installing Burlap Panels, select quality water base latex
paint to be used.
2. Thin paint to 2 parts paint, 1 part water or thinner. *(Paint should
be the consistency of milk.)
3. Apply paint to Burlap one panel at a time using a 9" roller
with standard nap for smooth surfaces.† Paint panel edges between adjoining
panels using a standard paint brush.
4. After the painting of each panel, follow over painted panel with
a dry roller to remove any excess paint to prevent filling in the burlap
texture.
5. Continue process until all panels are completed.
6. Allow panels a minimum of 12 hours to dry before application of
second coat if so desired.
*NOTE: It is recommended that a small quantity of paint be mixed and a small sample painted and allowed to dry to assure satisfaction of color and texture prior to painting larger panels.
†NOTE: For smaller jobs a 4" wide paint brush may be used. When using a brush, work paint into panel so as to not leave excess paint on panel, thus filling in burlap texture.
Moldings
Homasote black or white vinyl moldings are available for a neat professional
finish. These moldings include cap, inside and outside corners and "H"
molding for butt joints. Wood or other moldings may also be used.
Cutting burlap panels (to produce a finished edge)
1. Using a utility knife, break the Burlap seal on the back of the
panel and pull the Burlap back past the point where the new cut is to be
made.
2. Mark the substrate to the desired new dimension and cut substrate
on this new line.
3. Cut Burlap approximately 2" beyond new edge to allow material for
new edge wrap.
4. Apply white glue, or other quality wood glue, to the surface edge
and back surface of the substrate. Pull Burlap tightly around edge and
smooth the surface. Staple to back of substrate to maintain pressure while
glue sets.
Cutting panels
Cuts can be easily made by either hand or power sawing. Always use
a medium to fine tooth saw whether hand or power. If cutting with a hand
saw, cut from finished side of panel; if using a portable power saw, rotary
or saber, cut from back of panel. Small cuts (electric boxes, etc.) can
be readily made with several passes of a sharp utility knife.
Availability
Homasote building products are available throughout the United States
and Canada from local building material dealers. Dealers should have samples
and literature describing all Homasote products. If not, write directly
to Homasote Company.
homasote
COMPANY
P.O. Box 7240
West Trenton, NJ 08628-0240
1-800-257-9491
Ph: (609) 883-3300
Fax: (609) 530-1584